Sunday, February 19, 2012

modern boy tumbler quilt


How's this for a modern tumbler quilt?  I love this quilt.  I started making it for friend who had a baby last autumn--just so you know, I'm never on time with handmade gifts and I've accepted that.  Because she's not a really close friend, I decided not to splurge on fabric and use only scraps and other stuff from my stash.  But as I got further into the process, I realized that i. love. this. quilt.  How could I possibly give it up when the colors flow so well together and it brightens every day?

Let me repeat, she's not a really close friend.  During the process of putting this one together, I also read a post that discussed handmade gifts and the appreciation of the recipients.  It would be an incredible tragedy to gift someone with a handmade treasure like this that took so much time and thought only to find that they don't appreciate it nearly as much as you would have if you'd have kept it.  So far, I have only given these kinds of gifts to family and a few close friends who I am certain appreciate the love that I put into the project.


So does that justify my selfishness for keeping this one?  Maybe not, but since it was my time and energy, I have complete control over the destination of this quilt.  And since my 3-year-old, who typically couldn't care less about something I've made him, lit up with excitement when he saw this one and asked if he could have it immediately, there is just no better place for this one to go.

When I first became obsessed with modern quilts, I realized that most modern quilters didn't use borders.  That's actually what intrigued me about modern quilting.  But the more I quilt, the more I find myself attracted to quilts with borders.  A border frames the quilt design and, I think, brings more attention to it.  I'm not saying that borders are necessary all of the time--I've seen so many lovely quilts without borders--but I do think I will be using them more often.  A quilt with a border looks more like a photo inside a frame and I really like that look.


For the backing I used this dot fabric from the "Wild Cat Woman" line by Loralie Designs.  It's just greyish fabric with black dots, but once you know what it's called, it certainly does look a little girlish . . . but don't tell the boys.


I quilted this one by first outlining each column of tumblers and then quilting inside each column following the same outline.  I then quilted around the border with a few straight lines on both sides.  I didn't quilt inside the border because I wanted it to pop out of the design.  Very simple as far as quilting methods go.


This quilt measures 36" x 36".
It's just lovely . . . and it will definitely be well appreciated.


Thursday, February 2, 2012

a pair of {feminine} slippers


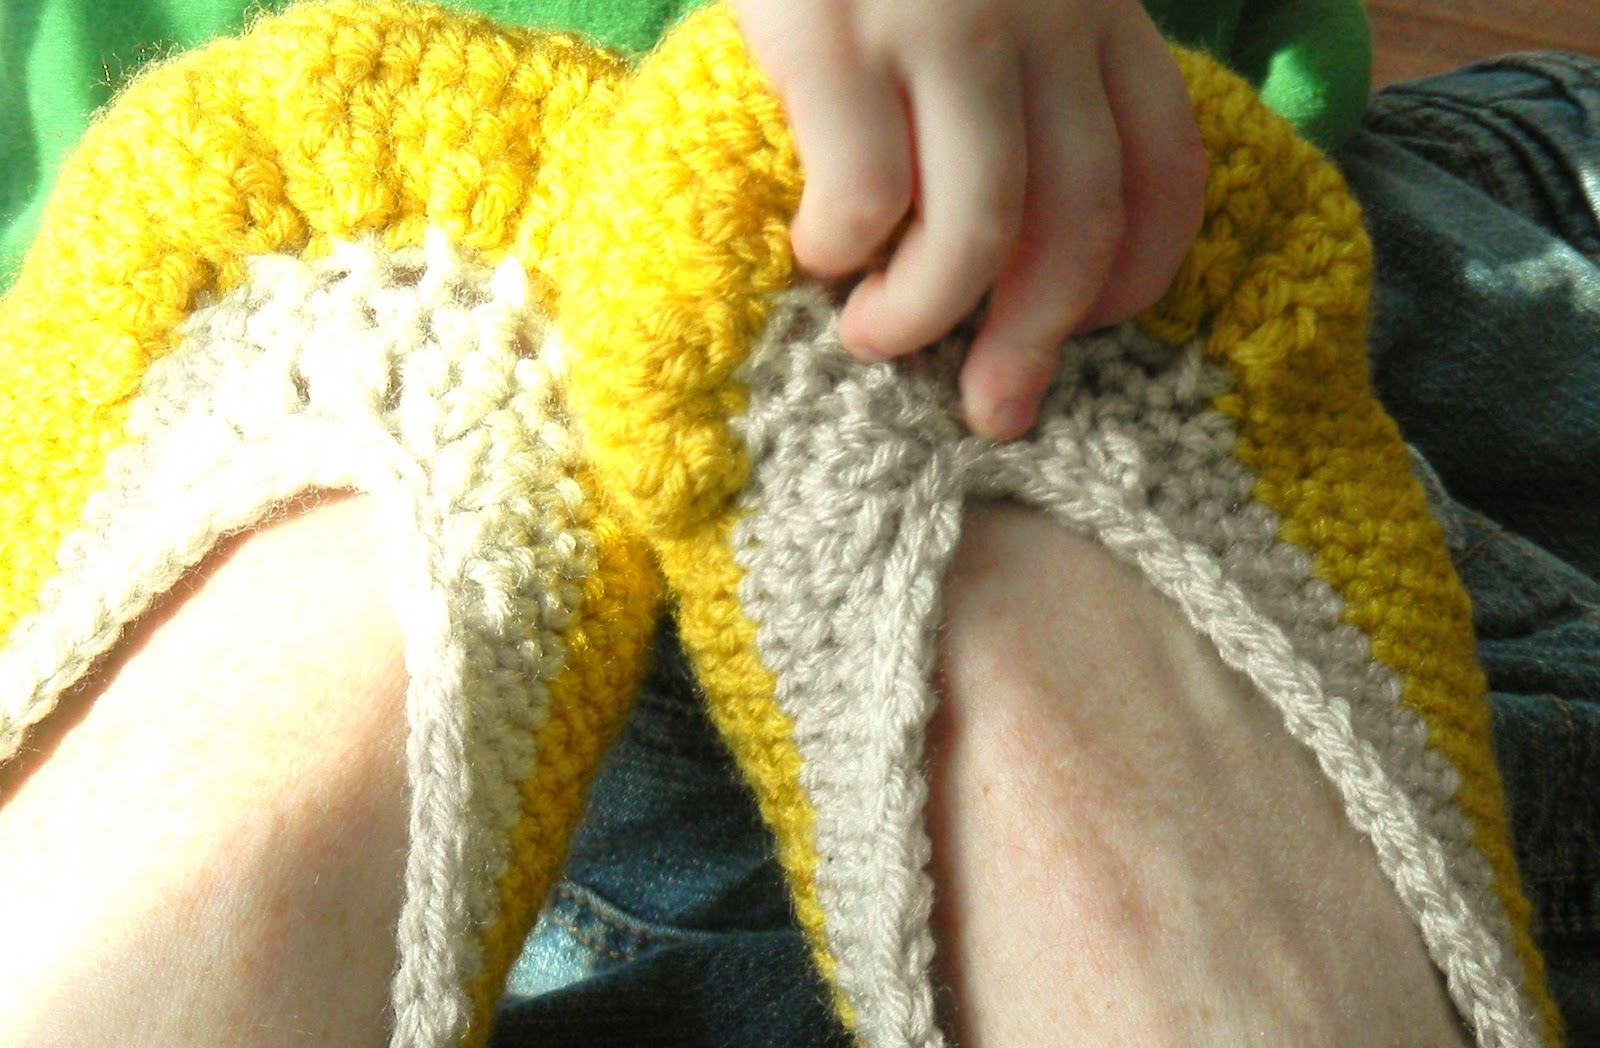
I just love these slippers!  They are so cute and they worked up pretty quickly.  I purchased the crochet pattern from Holland Designs, the same place I purchased the pattern for this hat.

The pattern doesn't call for a color change, but I think they turned out really great.  I just love the yellow and gray color combination (again, I'm probably behind the color trend here since gray and yellow popped up at least a year ago).  Such a nice transition.  And this button strap is super feminine and functional; the slippers really stay put.


I made a couple of other changes to the pattern, too.  I took in the one side of the soles a little in the middle so they would resemble feet better.  What's funny about that, though, is that I reversed the shoes when I added the strap so it's like I'm wearing them on the wrong feet!  But I can't tell at all, so maybe this adjustment was unnecessary.  I also wasn't too excited about single crocheting the sole, so I double crocheted instead to work them up faster.  I love the result.


I may try to add a faux leather sole so the slippers don't wear out so quickly.  I have no experience with hand crocheted slippers, so I'm not really sure how long it would take to wear out the sole.  But I'm not willing to take the chance because I adore these.


I've been thinking that I might need another pair so they won't wear out so quickly . . . I have plenty of other color combinations in mind.

Saturday, January 28, 2012

a double wrapped simple cowl


This is a super simple cowl to crochet.  I bought this yarn last month thinking I would make a hat.  But I've been making a lot of hats lately (although I guess none were for me), so I decided to make something else.  This is super bulky acrylic yarn that I got at JoAnn's.  It was one of the bulk packs and it has slubs of yarn for added interest.

I found the tutorial at Crochet In Color.  Liz has several great (free) tutorials.  She calls this the Effortless Cowl and it really lives up to its name.  I was tempted to change it up a little because it's so simple, but I thought that with the added texture of this yarn that any extra details would get lost.


I have the cowl double wrapped around my head in the photos above.  I usually find things that have to be wrapped a little to finicky for my taste, but I decided to give this a try because Liz made hers look amazing!  There is still plenty of room to move my head around and the combination of extra thick yarn and a double layer keeps me nice and warm.  I'm not sure I would wear it to play in the snow with the boys, but it works well for just walking around.

This is how long the cowl is without being wrapped.  It reaches my waist.  Please excuse my weird expression in the photo below.  I was in charge of my own photo shoot here and it looks like I was more concerned that I was pushing the right button.

Tuesday, January 24, 2012

a boxy yarn pouch


I wanted something that I could use to carry my small crochet projects.  I found this really great tutorial, but I wanted something a little bigger.  This tutorial is good, too, and closer to the size I wanted.  I decided to add this larger strap across the side seams so I could carry the pouch around. 


After a few ripped seams, I figured it out and I'm crazy about the result.  The pouch is a perfect size to fit a skein of yarn and a small project.  All the seams are hidden and the large strap is fun to carry around!

Note: It appears that these pouches were popular back in 2009, that's 3 years ago, because that's when all the tutorials were posted. I'm always several years behind the trend, so if you are looking for the newest trend, you don't want to follow me around.

Tuesday, January 10, 2012

another brimmed hat {crochet}

Do I really even have to put crochet in the title anymore?  I suppose you can pretty much figure that when I make a hat, it's been crocheted.


This hat was made using Vickie Howell's new Sheep(ish) yarn available at JoAnn's.  I really, really like the look of this yarn.  As with the first brimmed hat I made, I wanted to look for a softer looking yarn, but I needed a manly color.  This yarn is like a gunmetal sort of color, mostly black with a grey/silverish sheen.  The hub agrees that this color is perfect.  The yarn is really soft, too, and it comes in lots of fun colors. 

I started this hat using the same Cheri Hat pattern that I used for this hat, but part way through I abondoned this pattern for my own.  This hat is for the hub (although he declined my invitation for a photo shoot).  When he saw the first brimmed hat that I made, he asked if I could make one for him.  The pattern doesn't give adjustments for adult sizes so I had to improvise.  I originally increased for 7 rounds in double crochet, but that proved to be too big to I pulled out a round.  Even 6 increase rounds was too big, but I got too far before I realized it.  I corrected the hat a little in the back by decreasing a few stitches and it's not noticable, but I should have done a few more decreases.  Next time, I will increase only 5 rounds in double crochet because don't forget that hats are supposed to stretch a little.


I also couldn't get the brim to look right using the pattern I had.  I tried 5 different ways of adding the brim, but I ultimately settled on this youtube demonstration by bobwilson.  I really like her videos.  They are modern designs and she does a really great job of explaining all the steps in all of her demonstrations.  I'm still not convinced the brim looks exactly as it should, but it's much better than what I started with.  I even had to try this one 3 different times to get it to look like this.  I'm not sure if blocking it will give it just the right look or not, but it's worth a try.  I will just have to keep working the idea until I find something that makes it look just right.


ps.  I just picked up the Holiday 2011 issue of KnitSimple at the library and Vickie Howell is on the cover.  In her interview, she explains how her mother tried to teach her to knit when she was younger but she hated it.  She says she favored crochet and it wasn't until she was in her twenties that she learned to appreciate knitting.  If I just learned to crochet a month ago and favor crochet over knitting now, I should learn to appreciate knitting by the time I'm 50.

Saturday, January 7, 2012

a baby hat with a mod brim {crochet}


My sister's friend, whom I also know from school, just had a baby in July and my sister wanted something to give to the baby for her first Christmas.  Because it's rare that I can make something for a little girl, I jumped at the chance.  I decided to splurge on some 80% baby alpaca wool and 20% silk from Debbie Bliss because the pattern I had in mind was just a plain brimmed hat.  I thought some really good yarn in a really fun color would make it less plain.  I used almost the entire 50g skein of color 25010 for this 6 month sized hat.

This yarn is so soft!  I just kept feeling the hat after I crocheted it.  And I really do think this wool helped give the hat a really feminine look.  I used a free pattern that I found on Ravelry; it's called the Cheri Hat.  I really like the pattern exactly how it is and I will definitely use it again for a baby hat, but sample hats in the pattern used cotton yarn.  Although very practical for kids, cotton yarn just doesn't have the same look as wool.  Luckily, I think my slurge paid off because my hat turned out looking softer than the sample.


Sorry, no baby to use in the photo shoot.

Also, it's amazing how colors can look different in different types of light.  I don't think the hat was quite this pink


Other Notes:  I read somewhere once that acrylic yarn is easier to learn with than any other type of yarn.  I don't usually buy into this stuff, especially if as a beginner you knew that you wanted to use merino wool all the time then why wouldn't you teach yourself using merino wool.  But when I crocheted with this stuff, particularly when I made a mistake and had to correct it, I really realized the difference they were talking about.  Acrylic yarn is easy to pull out; this alpaca and silk yarn is not.  It sticks together better and is difficult to tear, which I guess is a good thing if you are not trying to fix your mistakes.  If I would have used this as my first yarn, I would have been completely frustrated and probably never moved past my first hat.  But now that I know, I will first be more careful with my stitches and second be more patient with my corrections.

Tuesday, January 3, 2012

a cross quilt for the neighbors


After all that crocheting, I have a new quilt to show.  This one I made for my wonderful neighbors who are always so sweet to the boys.  We spent a little time getting to know them and they are by far the best and most welcoming neighbors we've ever had (and we've had a lot of neighbors).  I hope to spend more time getting to know them in the coming years.

Because quilts take so much time, I looked for something new to try that didn't involve me calculating a lot of math.  I'm not typically opposed to that (math is my all time favorite subject) but I knew it would take much longer if I had to do that part too.  So I basically just did exactly what Sew Katie Did quilted here in her cross quilt.  I even decided to use the same type of quilting she used in her quilt because that is another part of the process that takes me a while.  I used light blue thread to quilt this, so it's a little hard to see.


I cut the pieces a little differently, too.  In addition to all those squares, I used some rectangles so I wouldn't divide up the larger prints.  Katie had a link to this tutorial here by her friend Meaghan, so I used Meaghan's tutorial to cut my pieces.

I found all of these prints at JoAnn's, and many of them are of them are by DS Quilts including this backing.  I used just this print for the back.


I chose to bind the quilt in red to pull out the red from the backing as well as a few of the prints on the front.  I really like how the red pops, especially against this green.


This was my second attempt at machine binding.  I usually enjoy hand binding, but in the interest of time, I utilized my machine.  It took about a quarter of the time.  With this second attempt, I researched how to do it first and it really worked out well.  I used the method described by Red Pepper Quilts, but I think Crazy Mom Quilts has a good one, too, that's just slightly different.


Saturday, December 31, 2011

a cabled hat {more crochet}


Since I was making a hat for one sister, I crocheted a hat for another sister.  I wanted something a little more elegant for this one, so I purchased a pattern from Holland Designs.  This is the Diamond Slouch Beanie pattern.  I found this pattern through Etsy, but it looks like she sells them on her website, too.  If I would have had the money, I would have bought the whole store!  She has some really neat designs and many of them have a knitted crochet kind of look.

This was my first lesson in yarn weights.  This pattern called for DK weight, but I only had worsted.  I just thought it work up more quickly, but it ended up being huge!  I had to downsize it quite a bit.  The hub asked me at one point who the skirt was for.  I knew at that point that it was too big for a normal size hat.

One of the best things about the yarn medium is how quickly you can fix mistakes.  Just pull out your stitches and you can start over.  No slow, sharp, and frustrating seam ripper to worry about.  So I just pulled the yarn out to the appropriate height and joined the hat at the top.


This hat has some weight to it.  I hope my sister doesn't get neck cramps wearing around.  But it will definitely keep her head warm.  As fussy at this pattern was (or I should probably just say advanced), it did help me understand cables and it's a really elegant and timeless hat.  I would do this one again, just in the correct weight and maybe in a really fun and girly color.

I used Vanna's Choice in Wheat.  I used nearly 2 full skeins.

Friday, December 30, 2011

crochet puff hat


I love crocheting hats for some reason.  I usually don't like making more than one of anything, but hats appear to be the exception.  Good thing it's winter or this would be a useless effort.

I wish I could tell you a nostalgic story about how I learned to crochet, and it would have been possible because my mom has always crocheted.  But I never showed any interest until now and, unfortunately, she lives 6 hours away.  So left to my own devices, I learned to crochet from youtube.  There are a lot of good tutorials that show you exactly what to do.  I learned this puff stitch and the general idea for the hat on various youtube videos.  I made sure the size was right by just trying it on.

I wanted this hat to be a little fuller around the top so it would have little waves.  Most of the tutorials I saw made the hat in the traditional hat shape (like a rounded cone), and I knew I wanted it a little more modern than that.  So I increased the number of puff stitches to start with which made it a little fuller.  It's amazing what you can learn from trial and error. 

I made this hat for my sister for Christmas and the hat actually looks better on her.  I wish I would have gotten a picture of her in it.  I'm sure people get tired of seeing me pose in all my photos.


I would definitely do this hat again.  It worked up really quickly, I think it took me two evenings, maybe 4 hours total and it was only my third hat.

I used Vanna Choice yarn in Grey Marble. I used about 1.25 skeins for this hat.

Tuesday, December 27, 2011

a new hobby {and a cozy for the tools}

I've been crocheting . . . a lot.  I got it in my head one day to learn to crochet so I could make a hat.  It's always fun to me to learn something new, but I wasn't sure how it would go.  I taught myself to knit (but not purl) a couple of years ago, and it was fine.  That pretty much means that if knitting was the only way to pass time, I could tolerate it but it certainly wouldn't be my first choice of crafts.

But for some reason, crochet was different for me.  I first made a hat for my 5-year-old that was too big.  After reworking it, it fits now but there is nothing special about it.  I hijacked it back so I improve it even more.  The second hat I made was for my 3-year-old who doesn't appreciate handmade items as much.  But this hat is so cute.  I just can't figure out how to get the photos off my phone.

I have made several other hats that I will share soon, but I first wanted to share the case I made to carry my crochet hooks and knitting needles.  Most of these hooks and needles were extras that my mom gave to me.  I have since purchases a few hooks on sale of sizes that I didn't have.


It rolls up nicely for easy transport.


The only thing I would do differently (and I will have a chance because my mom requested one) is to add some kind of flap so the needles stay in when help upside down.  I try not to carry it upside down, but when I'm in a hurry I can't tell the difference.


Now I just have to remember to put my hooks back in here when I'm done with them.