Sunday, March 27, 2011

saddle up! {another boy's t-shirt}


This is my favorite shirt so far.  I spent some time a few weekends ago modifying the t-shirt pattern that I made for a boys size 4-5 into a boys size 2-3.  I'm sure this would have been easier if I understood the dynamics of pattern grading, but I consider myself a confident beginner and that it beyond the scope of such skill level.


Anyway, I just trimmed a little here and measured a little there and voila!  A new pattern size for kids ages 2-3 was born.  This was my test piece and I couldn't be happier with it.  The white part of the t-shirt was transformed from a ready-made woman's shirt that my sister was no longer enamored with (and she admits that it is much cuter this way).  The sleeves were refashioned from t-shirt scraps that I used to make a t-shirt quilt (top) for the hub.


I just love the raglan sleeve, particularly on little boys.  Girls gets all kinds of fun ways to dress up their wardrobe like ruffles, shirring, and other frilly things.  This is my way of making boys' t-shirts more interesting.  And the dual color style always reminds me of baseball . . . my favorite sport and a sure sign of spring.  These sleeves are sewn with wrong sides together, and the seams are folded to one side and sewn down.  I just love this look.  I've seen this type of seam finish on a lot of other blogs lately; they have been using a pattern from Patterns by Figgy.


And I am experimenting with neck seam finishes to give the shirt a cleaner look.  For this one, I took a scrap of white knit and folded it like double-fold bias tape.  I wrapped it around the back neck seam to hide the stitches.  I like the look, but I will keep looking for something a easier.  This takes a lot of concentration.


I just love this shirt!  At first I thought the shirt was a little too big for my 2.5 year old, but the pattern seems to lean a little more toward the 3 side.  So it really is perfect for boys clothes that will last at least another year.


Wednesday, March 16, 2011

swimsuit cover-ups {little boy and mommy}

We recently took a family trip to an indoor waterpark to celebrate Logan's fifth birthday.  I wanted to make both of the boys a swimsuit cover-up, but as usual, I had more imagination than time.  My idea was to transform an adult-sized robe into two little cover-ups, but my first attempt proved a little more snug on Logan than I thought it should be.  So I passed it down to the little brother.  And then I ran out of robe.  So Logan's will have to wait.


I gave this little boys cover-up inset sleeves, but if you are thinking of making one for your little boy, skip the separate sleeves and go kimono (or dolman) style.

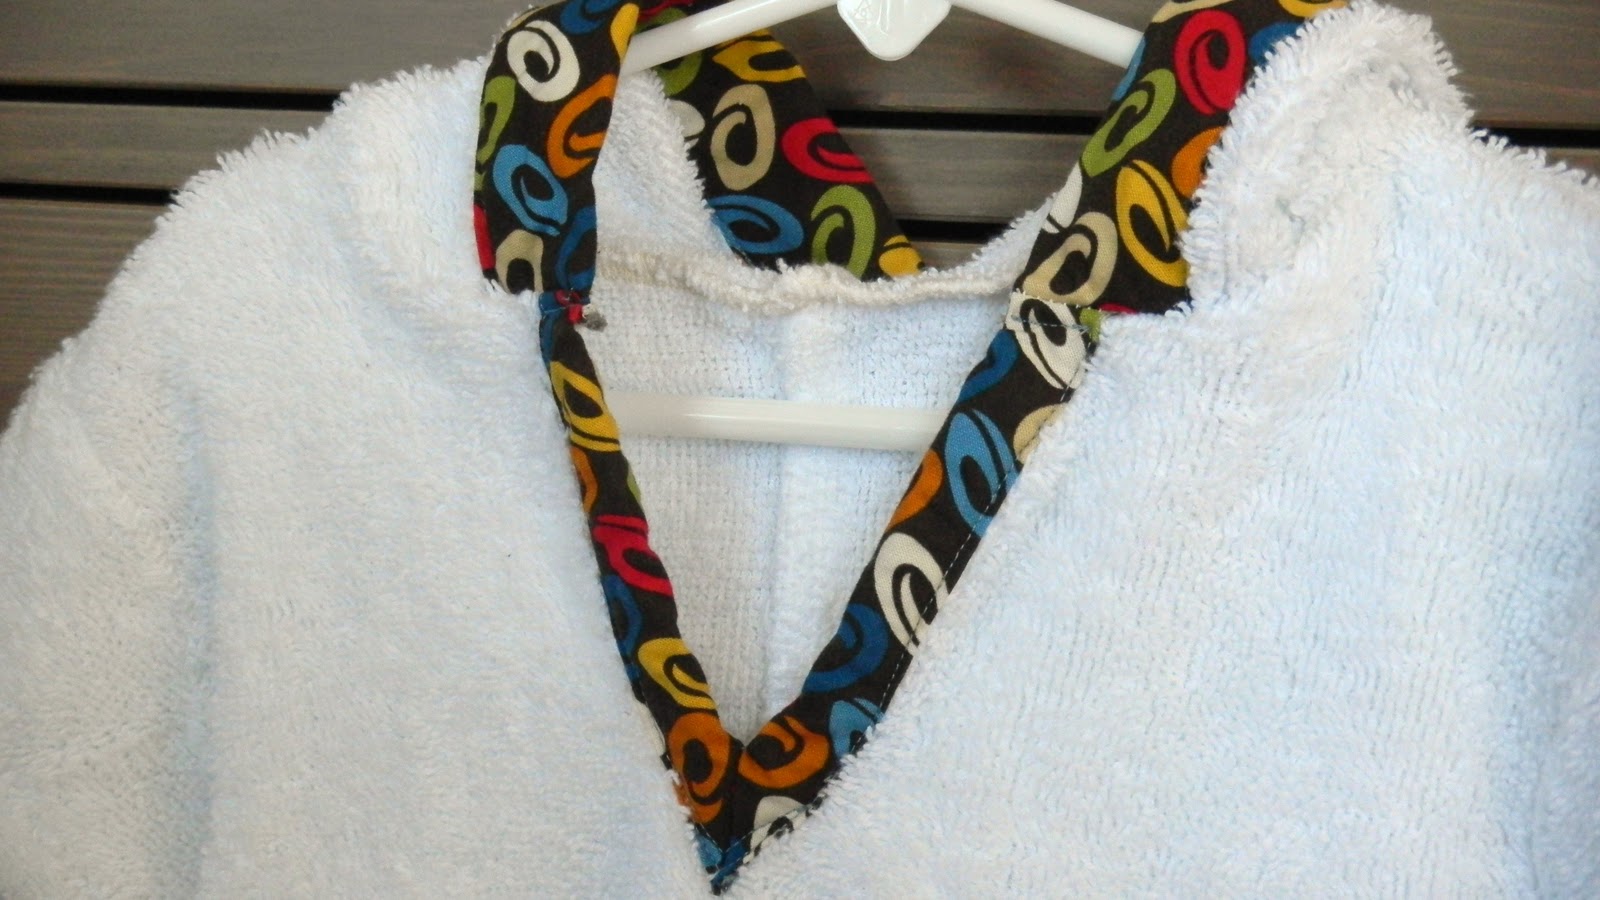
I added this trim for an extra bit of boy color.  A swim cover-up, unfortunately, is not something that screams boy, so I tried to make it unmistakably boyish.


And a hood helps with that mission, too.


I'm not sure the tie at the waist is particularly boyish, but it's blue jersey knit from my t-shirt scraps.  I thought the cover-up needed a little waist definition.  I sewed a casing around the waist on the inside with regular cotton woven fabric and threaded the tie through it.  Then I cut a couple of tiny holes to pull the tie through the front on both sides.

It keeps him warm, so we're both happy.


And this one I made for me.  I used a yard of dark purple terry and sewed a basic rectangle.  I made a casing at the top with cotton woven and threaded elastic through it.  I would definitely recommend straps and I might add some.  It's a little too easy for this to slide down . . . but maybe that's just a small bust problem.

I left the bottom edge frayed and sewed a couple lines of stitching to prevent too much fraying.


And because I love extra details, I added a couple of in-seam pockets.  Genius idea, just not carried out all that well.  I didn't measure where I put them so they are a little too low to be really useful.  But it did help me understand how these types of pockets are formed.


A good start for my first attempt at both types.  Now if Summer would just come a little quicker.

Sunday, March 13, 2011

bean bag toss game


A lot of sewers have tackled this easy project.  I turned mine into a game.  I was enamored with the idea of creating some of these super simple bean bags, but I wanted more than just a few bags to keep the busy boys, well, busy.


I created this mat to toss the bags onto.  The mat was made with 6 different 8.5 inch squares.  I appliqued a number in each square so we can keep score (I always use double-sided fusible web to hold the applique in place while I sew).  Keeping the numbers low (1, 2, and 3) allows my 5-year-old to total the points on his own.  This game will help him start learning simple math. 

These bean bags are so simple to make.  I bought a Central Park by Kate Spain charm pack during my last visit to a local quilt shop and the size is perfect for this project.  I was nervous to use my coveted charm pack for the bags (I confess to hoarding gorgeous fabric), but I just love how they turned out.  I used the same fabric for the backs as I used for the binding, but I could easily have used more charms.


These bags measure 4.5 inches square.  I filled them with about 2/3 cup of cheap white rice.  This amount filled the bags about 3/4 full.  I used almost 2 lbs of rice to fill 6 bags. 

I just can't get enough of these.


And since I can't stand when accessories stray from their toys, I added a few extra details to transform the mat into a carrying case for the bean bags: a tri-fold style, side flanges with hook and loop tape, a hook and loop closure, and a convenient handle for easy transport.


Now the game can stay together and we don't have to go searching for the bags before we can play.


This was just one of the ideas I came up with for a bean bag game.  There are so many other ways to go with this (a bullseye style mat and nesting baskets to throw the bags into were a few of my other ideas).  I think this game might just be my go-to gift for little ones now.

Friday, February 25, 2011

a new messenger bag {yep, for me!}


I cut out the fabric for this bag at least a month ago.  But you know how it goes; you get busy with other things.  There hasn't been a lack of sewing around here.  Just a lack of sewing for myself.

I picked up this linen as a remnant and originally had plans to make a pair of pants for one of the boys.  But I've had it in my stash for a while, so I decided to make a new bag for myself instead, you know with spring coming at all.  I added some decoration to the front flap for a little interest to a neutral fabric: a few lines of blue straight stitching.


Look at this great print I used for the inside lining.  I have no idea what it's called.  I bought it at a quilt shop near my in-laws two Christmases ago.  It makes me giddy everytime I open the bag!


Not much thrills me more than a bag with lots of pockets.  So I added this green one on the back.  I also added some light green lines of stitching to the back in the bottom right corner, but you can't really see them.  In this photo, they look more like wrinkles.


I also added one of these small orange pockets on each side of the inside to hold keys at such.  These help with organization while accessibility.


And here is a green zipper pocket for hidden treasures . . .


I think my favorite part of this bag, though, is the strap.  That doesn't happen often, but I really, really like this print.  And because I couldn't get enough of it on the back of the strap, I had to add a few pieces to the front, too.


I tried to think a little differently for the strap attachment here.  I added buttonholes to the strap so I could attach it with buttons.  I also layered two buttons and placed a green bead in the center.  I thought this display might be a little more interesting that just a plain button.


Just lovely.  I can't wait to show it off.


And if you would like to see a kid's version, take a look at the messenger bag I made for Logan for his fourth birthday almost a year ago.

Wednesday, February 23, 2011

my two assistant cooks


Just like most kids, my two love to help in the kitchen . . . particularly when we make cookies.  So I made them these aprons to keep their clothes as clean as possible during the process.


Trent's apron is made using one fat quarter for the front and some extra solid fabric that I had laying around for the back.  I used another part of a fat quarter to make the pocket.


Yes.  These are cats.  The fish fat quarter was part of the bundle.  We're not a cat family, but I thought this bundle was kinda fun.

I used elastic for the neck band, but of course it ruffles (a point I forgot about when I chose the orange star fabric).  The neck band is a little girly, but I think a 2-year-old can get away with it.

I refashioned Logan's apron from a hand towel.  I have a set of these Crate & Barrel hand towels from years ago.  They are really great to look at but they are not the best for soaking up water.  So I convinced myself one would make a fine apron.

And I added a little apple applique for good measure.


I used some leftover fabric from Logan's lunch box for the pocket.  I love this fabric.  It adds a fun extra pop of color.


The one thing I might do differently next time would be the tie.  I created the tie to mirror my aprons: one long tie so it can be adjusted to pretty much any height and weight.  I can see how this would be necessary for commerical aprons, but it's really unncessary for my 4-year-old.  It's more of a pain than anything because I have to work to adjust it whenever he puts it on.  So next time, I will just make a neck band and regular ties similar to Trent's above.


These should bring us many happy cooking memories.  These aprons have also doubled as clean-up-toys-without-complaining aprons.  I guess they make work more fun, too.

Tuesday, February 22, 2011

happy birthday little bro

Today would have been my brother's 25th birthday.  So I made this mug rug to celebrate.  I can't even begin to describe how much I wish he was still here so we could all celebrate this milestone together.

I miss you, Jimmy.  Please continue to check on us once in a while.

Happy Birthday.


Sunday, February 20, 2011

two new boys' shirts


It's still cold here, so I've been making the boys a few new long sleeve t-shirts.  I know it's getting late in the season for long sleeves, but I want to experiment with my patterns, improve my techinque, and see what kind of designs I can come up with.  It's really hard to find cute boy stuff out there.

I made this one for my 4-year-old out of t-shirt scraps from the t-shirt quilt (top).  I decided to try a raglan sleeve.  I totally love raglan sleeves, particularly for boys.  It's a great way to add interest (assuming at least two colors are used) without too much effort.


I didn't have enough solid red to make both sleeves, so I decided to incorporate the front lettering on the t-shirt into one of the sleeves.  This sleeve advocates supporting our troops.  It's a little different and, at first, I didn't like it.  But every time I see it, I like it more and more.  It's definitely unique which is always the goal.

I made this shirt for my 2-year-old out of a $10 very lightweight knit from Express.  After I brought it home, I realized why it was only $10.  The sleeve seams were crooked and the stitching came loose after the first wash (ah, the things you notice once you learn how to sew).  But I cut it down to a 2T size and it serves it's purpose.  I added some new white ribbing around the neck, and I really like the contrast.  I wonder how long it will stay white, though.


The USA patch came from a 12-month t-shirt that both boys have outgrown.  I have kept several of my favorites to reuse in the future.

Speaking of working on techniques, I added something a little more professional in this one.  I took a leftover strip from the hem and covered the back of the inside neck seam and shoulder seams (can you even tell?).  Most professionally sewn t-shirts have this. It really didn't take that much extra effort.  I also top stitched the arm and neck seams for a more professional look (and to tack down the inside seam for extra comfort).


Unfortunately, these details go unnoticed by most people.  I might not be able to crank out as many projects when I concentrate so hard on the little extras, but it makes me feel good to know that I really put a lot of energy into one project and did it well.

Watch out.  There will probably be more of these.

Wednesday, February 16, 2011

red, white, & blue (& green) quilted body pillow cover


This body pillow cover is for my dad for his birthday today!

He bought a body pillow several months ago to help comfort his aging muscles, but I heard from my sister that he was having a hard time finding pillow covers for it.  So I decided to make one from the fabric I had leftover from the Patriotic Salute quilt that I made for his 60th birthday last year.

I have a really annoying problem.  I don't like waste.  So when I figure measurements in my head, I only leave a 1/4 inch seam allowance.  This allowance is perfect for my sewing techniques, but when I measure something incorrectly, it throws off the entire project.  This pillow cover was supposed to be 18 inches by 44 inches.  The finished dimensions are actually 17.5 inches by 41.5 inches.  Sigh.


So he will have to use his 61-year-old muscles to jam that pillow inside this cover.

Oh well.

Tuesday, February 15, 2011

i didn't win a sewing machine, but . . .

I was one of the 10 finalists!  Out of 871 total entries!  I am indescribably excited.  I didn't do a lick of work all day because I was so excited.  Oh well!

Zip on over to Prudent Baby to see all the finalists and the winners.


As a really fun surprise, Valori Wells who designs for Free Spirit donated a yard of her fantastically gorgeous fabric to each of the 8 finalists who didn't win the sewing machines.  What a wonderful girl!  So I should receive my yard of randomly chosen fabric in the mail soon.  And check out Valorie's website.  She has 3 free quilt patterns posted that all showcase her fun fabrics.  This one is my personal favorite.


Now how do I explain to the hub that it's simply an injustice to own only one yard of this beautiful fabric?

Wednesday, February 9, 2011

two season potholder


This is my entry in the Prudent Baby Sewing Machine Double Down contest to win a new Brother sewing machine.  Of course my entry is last minute (today is the last day to enter), but if I don't wait until the last minute I will spend forever trying to perfect an idea, driving myself crazy to get every detail right.  Until, that is, it's the last minute anyway and I have no more time.

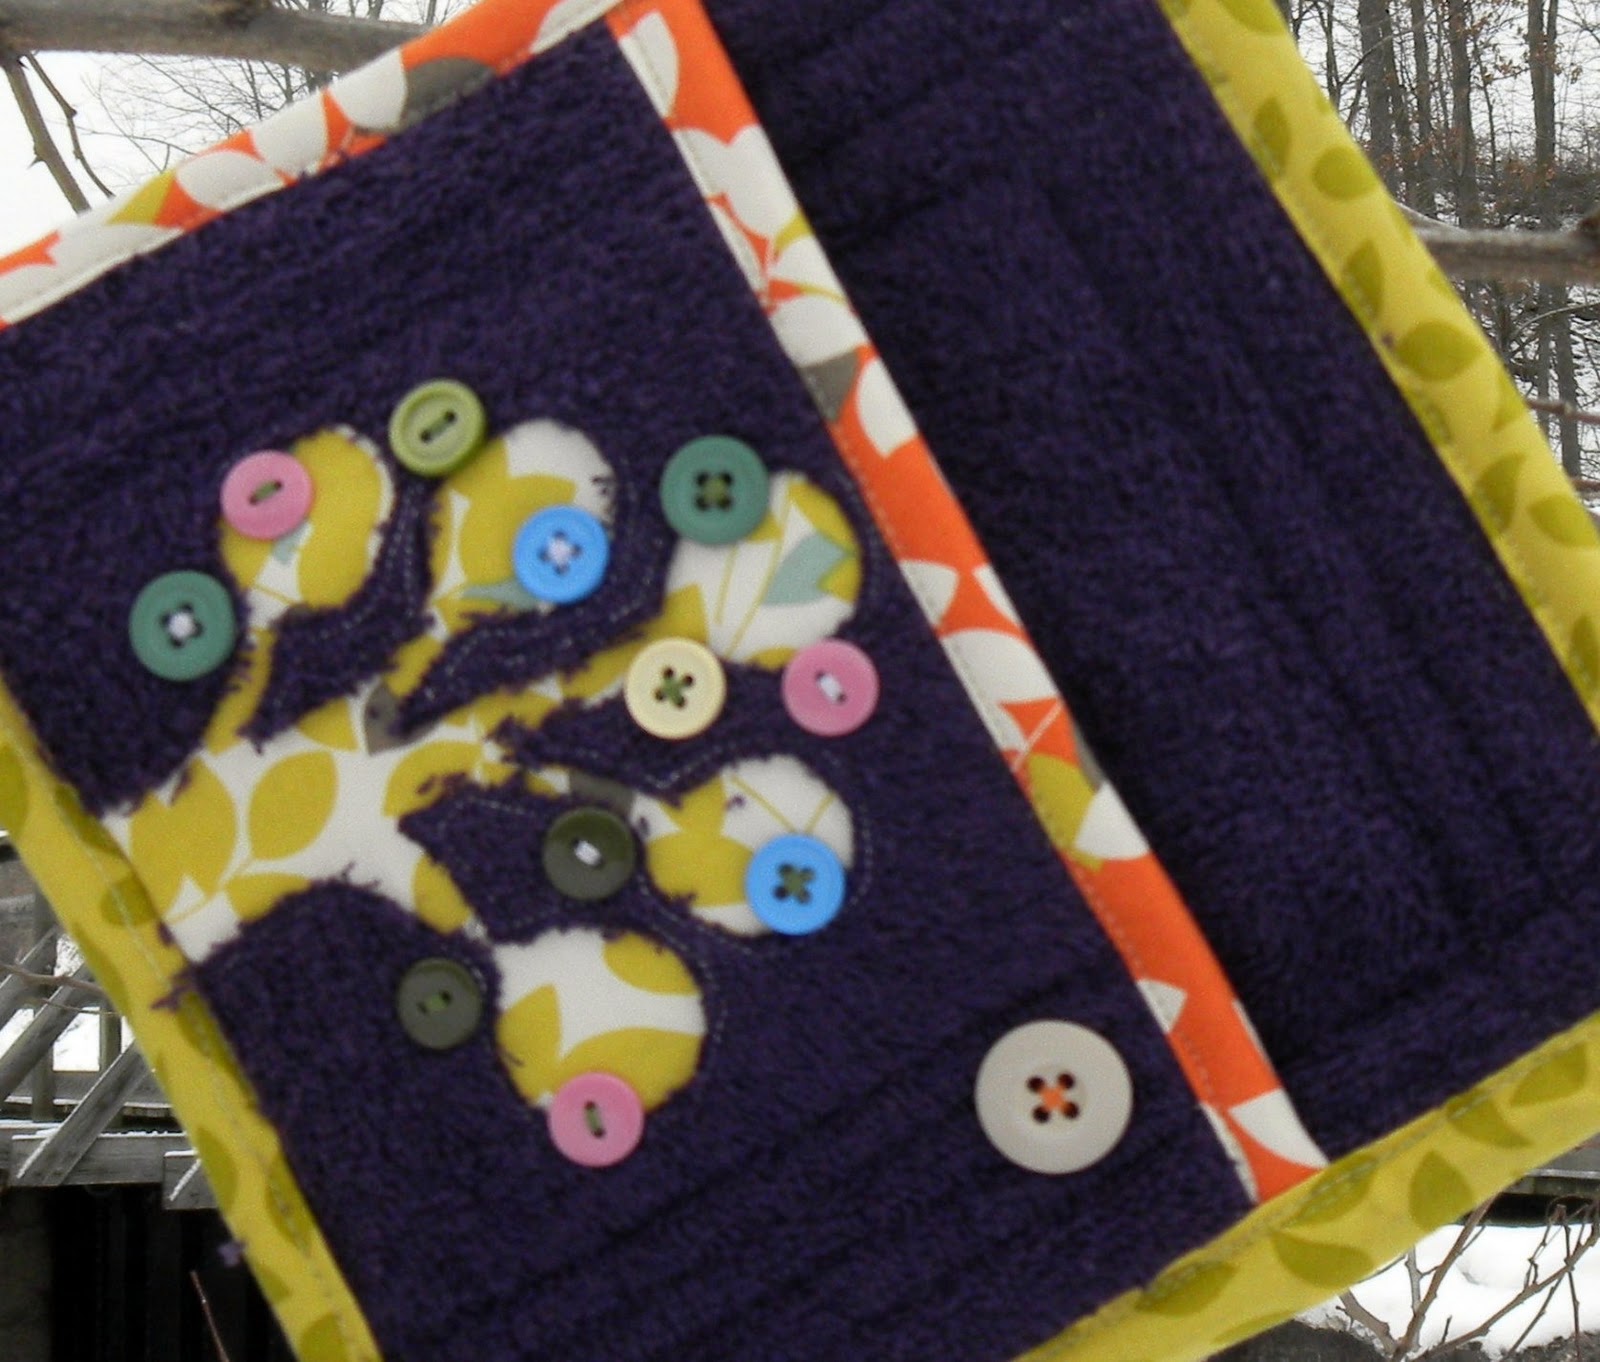
I call this a two season potholder not because you can use it for two seasons per year.  That would be ridiculous.  I named this one "two season" because, to me, each side resembles a tree in a different season.  This side with the buttons looks like a tree in spring with lots of colored, budding leaves.
 

After I placed the purple tree on this polka-dot fabric (it's Porcelina by Michele D'Amore for Marcus Fabrics that I picked up during my first trip to my local fabric shop a few months ago), I realized that I had another season: winter.  This tree reminds me of a bare tree in winter . . . with fabulous colored snow!


I wonder if these colors are too 1970's shag?  I really like the dark purple terry.  It's definitely not something I choose often.  I really didn't mean to mix so many fabrics, but I just went with what looked good at the moment.  Last (very late) night, I thought that these fabrics didn't really mix that well, but after I looked at it this morning, I decided that not only does it really not matter but I also kind of like these colors together.  After all, isn't one definition of creativity making uncommon combinations work together in a fun new way?  I thought so, too.


I followed Prudent Baby's tutorials here and here because I believe the rules required it.  I always forget how thick potholders can be with all these layers.  It really takes patiences and awareness to sew all these layers correctly the first time . . . two things that seem to disappear with every passing minute after, let's face it, 9pm.  And for a little extra fun, the loop I added at the top was made from the selvedge of the Porcelina fabric.  Now I can remember where to find more.

Wish me luck in the contest, unless of course you entered a potholder, too.  I will be hopping over to Prudent Baby on Monday February 14 to see the winners.  I'm sure they won't disappoint!