Showing posts with label charms. Show all posts

Monday, May 14, 2012

a rainbow of whirlygigs {a quilt}


When my oldest son saw the Petal Patch quilt I made for myself, with all it's bright (pink) colors, he tried to claim it for himself.  In fact, both of my boys tried to claim that quilt as their own.  But with as much as I give up to make my boys happy, that quilt was non-negotiable . . . it's all mine.

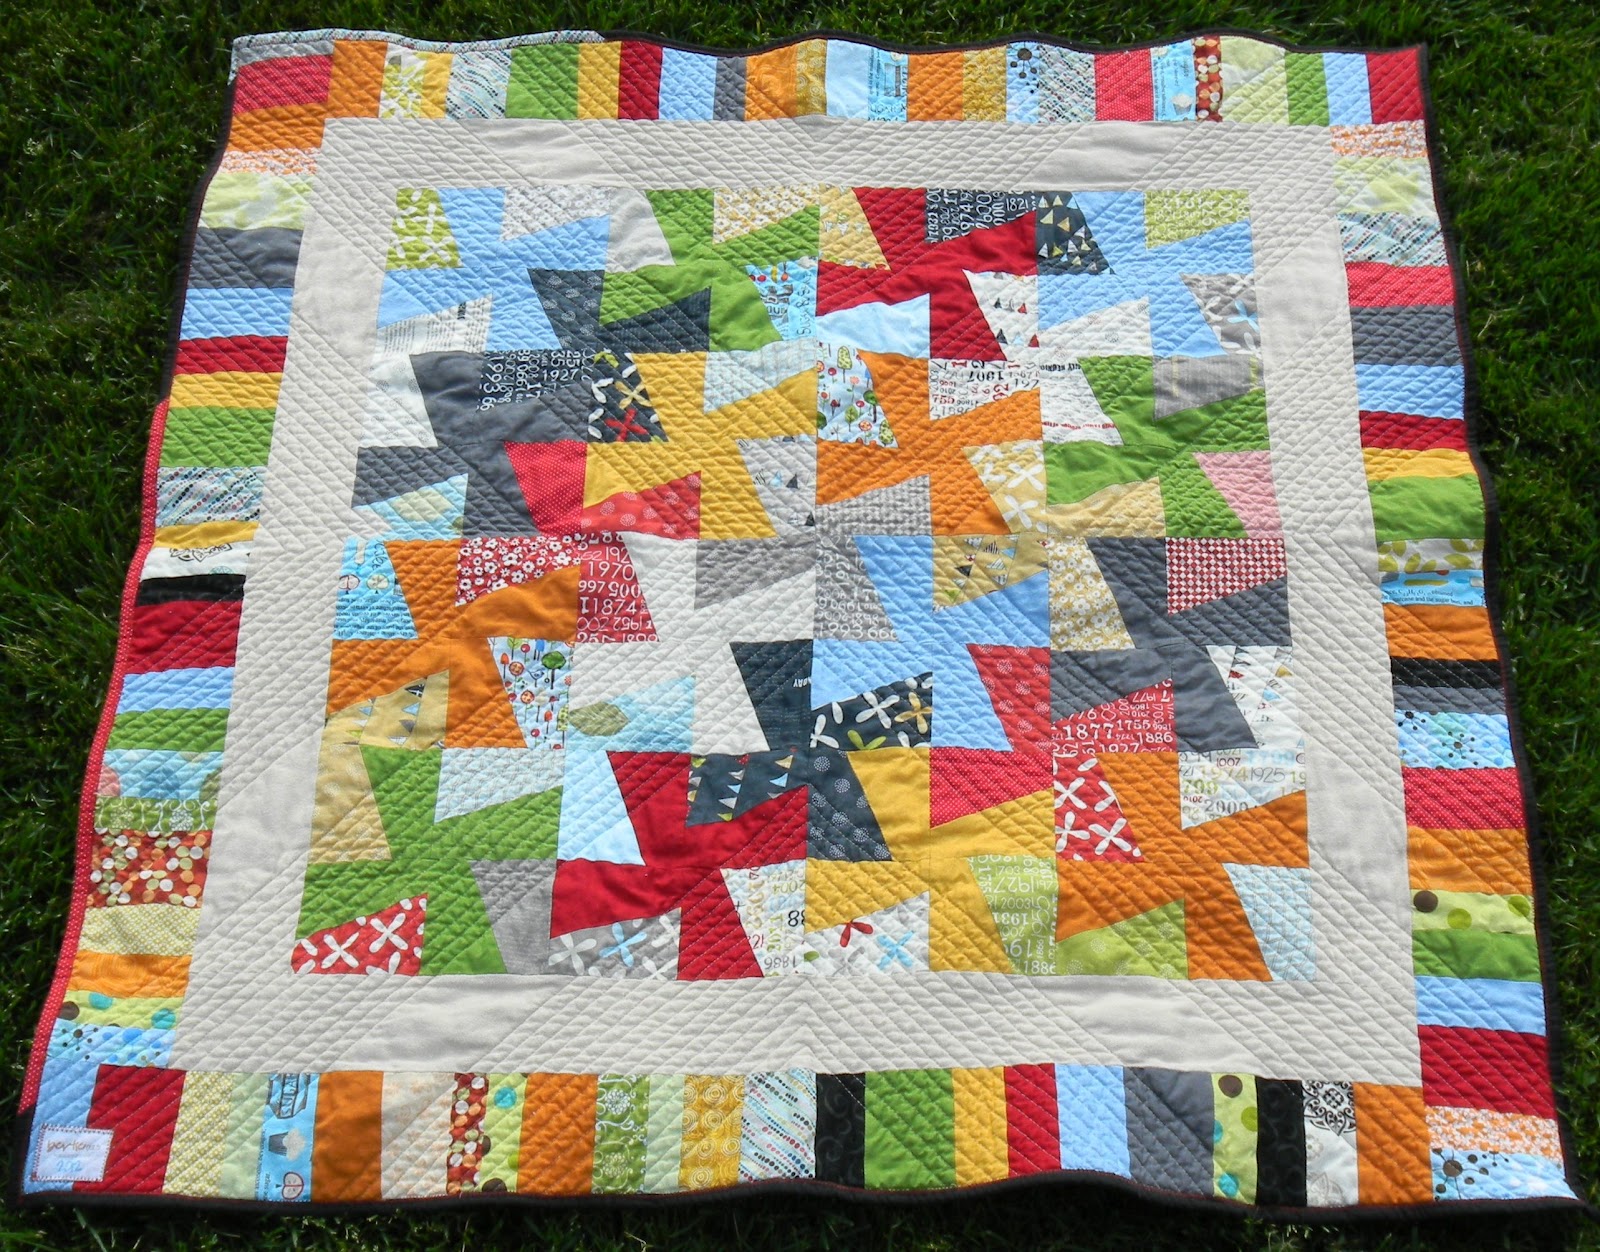
So to ease the pain, I promised to make Logan a new quilt just his size.  He told me that his new one had to be exactly the same as mine.  Since I knew dad wouldn't go for that, I decided on something very different.  I had a highly coveted Reunion by Sweetwater charm pack from my last run to the quilt shop that I decided to give up for his new quilt.  I knew I wanted a whirlygig or pinwheel type of quilt, so I just started cutting.


It wasn't until after I had cut all my charm squares that I did some research on these types of quilts.  I had no idea that many tutorials teach to sew the squares together in a grid and then re-cut to make the whirlygigs.  Since I had already cut my pieces, I stuck with my own idea of how to make the squares.  The usual way (if there is such a thing when it comes to custom quilts) may have been faster, but my way ended up working out just fine.


I decided to mix in a rainbow of solid colors as the offset to the Reunion whirlygigs.  I think the solids actually ended up taking over.  I even added another "rainbow" as a border to give the quilt even more color.  It's certainly a fun and colorful quilt and just right for a 6 year old boy.

Since this quilt measures about 44 x 44 inches, I was able to make the backing out of a full yard and a half of this airplane fabric.  I'm all for scrappy backings, but sometimes you just want something quick and simple.


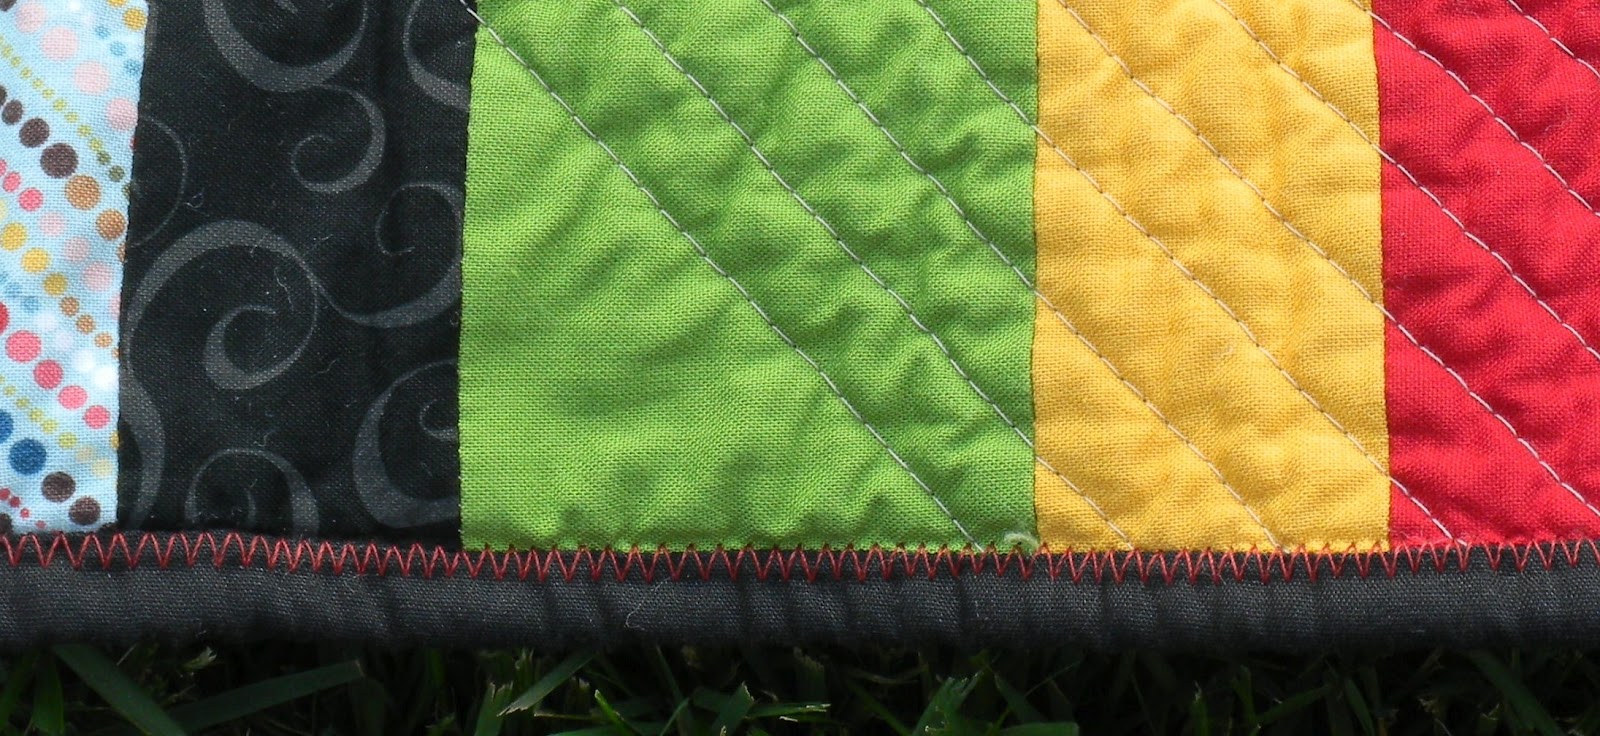
I quilted in an X sort of pattern with each line 1/2 inch from the other.  I've had this pattern in my head for a while, but I always came up with an excuse not to use it.  This time, I just decided to take the plunge with and, in hind sight I guess, I could pretend that I went with an X to coordinate with the shape of the whirlygigs.  No one really needs to know that this was just a coincidence.

For the binding, I decided not to hand sew this time.  I found this neat technique by Stitched In Color.  She zigzags all of her quilt bindings.  I thought that for this fun boy quilt the technique would be perfect.  The only thing I changed was that I sewed the binding to the back first and then folded the binding around to the front.  This saved me a lot of time because I was able to control the look on the front of the quilt.  I'm sure that there are many quilters out there much more familiar with machine binding who could do a bang up job the way she did it, but I'm not one of them . . . yet.


Saturday, March 31, 2012

petal patch quilt


This quilt is all for me...

or so I tell myself.  My youngest has already claimed this as his own. The good news, though, is that it's too heavy for him to carry around.

Living in a house filled with boys doesn't give me much chance for pinks and pretty flowers.  Not that I was ever really into either of those things, but after you've been surrounded by dirt and weird smells for a while, you start to crave the prettier things.


I picked up a charm pack of Puttin on the Ritz at my local quilt shop because I love the combination of pale pinks, light blues, and soft grays.  For the center and corner blocks, I used the disappearing 9 patch technique but added a little sashing in the middle.  To offset the subtle colors in the charm pack, I added a bold red to the corner blocks and a bright green dot fabric to the center.


On the other blocks, I used scraps to create a petal design.  Once I was happy with the design, I used the first one as a template for the others and just rotated the blocks.  I love the fun and vibrant colors in these petals.  If I was going to make this quilt again, I would use the same type of bold colors on the patchwork blocks to give it even more color.

Deciding on the quilting technique was easy this time.  I knew I wanted to draw attention to the petals using a growing outline design (I outlined the petals over and over again moving further out each time).  Then to mimic the petals, I used a meandering petal design on the patchwork blocks to help them blend into the backgroun and bring even more attention to the petal blocks.


I finished the quilt top with a gorgeous pink flower print border.  I found this at JoAnn's and now I wish I would have bought more.  It's a perfect pink color for me . . . not too bright and not too pink.

For the binding, I chose a gray dot fabric.  I almost when with blue to try to offset the pink and bring out the blues in the quilt, but I am so glad that I changed to gray.  The gray allows the focus to remain on the quilt top and doesn't steal away any attention.  Plus, dots are my favorite print for binding.

This quilt has already nursed me through a terrible ear infection, so it's definitely a keeper.


Here is what happens when you face the wrong way during the photo shoot.  But what a cute little bugger trying to help me hold up the quilt.


This quilt measures 55 inches by 51 inches.


Sunday, February 19, 2012

modern boy tumbler quilt


How's this for a modern tumbler quilt?  I love this quilt.  I started making it for friend who had a baby last autumn--just so you know, I'm never on time with handmade gifts and I've accepted that.  Because she's not a really close friend, I decided not to splurge on fabric and use only scraps and other stuff from my stash.  But as I got further into the process, I realized that i. love. this. quilt.  How could I possibly give it up when the colors flow so well together and it brightens every day?

Let me repeat, she's not a really close friend.  During the process of putting this one together, I also read a post that discussed handmade gifts and the appreciation of the recipients.  It would be an incredible tragedy to gift someone with a handmade treasure like this that took so much time and thought only to find that they don't appreciate it nearly as much as you would have if you'd have kept it.  So far, I have only given these kinds of gifts to family and a few close friends who I am certain appreciate the love that I put into the project.


So does that justify my selfishness for keeping this one?  Maybe not, but since it was my time and energy, I have complete control over the destination of this quilt.  And since my 3-year-old, who typically couldn't care less about something I've made him, lit up with excitement when he saw this one and asked if he could have it immediately, there is just no better place for this one to go.

When I first became obsessed with modern quilts, I realized that most modern quilters didn't use borders.  That's actually what intrigued me about modern quilting.  But the more I quilt, the more I find myself attracted to quilts with borders.  A border frames the quilt design and, I think, brings more attention to it.  I'm not saying that borders are necessary all of the time--I've seen so many lovely quilts without borders--but I do think I will be using them more often.  A quilt with a border looks more like a photo inside a frame and I really like that look.


For the backing I used this dot fabric from the "Wild Cat Woman" line by Loralie Designs.  It's just greyish fabric with black dots, but once you know what it's called, it certainly does look a little girlish . . . but don't tell the boys.


I quilted this one by first outlining each column of tumblers and then quilting inside each column following the same outline.  I then quilted around the border with a few straight lines on both sides.  I didn't quilt inside the border because I wanted it to pop out of the design.  Very simple as far as quilting methods go.


This quilt measures 36" x 36".
It's just lovely . . . and it will definitely be well appreciated.